Thursday, June 11, 2009

How to Photograph Water Drops with One Speedlight


Sent to you by MarcG via Google Reader:


via Strobist by noreply@blogger.com (David) on 5/28/09

Ever notice those cool water photos that drop into the Strobist Flickr Pool?

Water droplet photography is very easy to get started with, and you can get as complex as you want. There are three tricks to making beautiful, time-scultped water pictures with a single small flash: Light placement, timing and flash duration.

More, plus two videos, inside.
__________


Water Photography Basics

(Very cool water drop photos by Andy W., top, and Steve P., both from the Strobist Flickr Group pool. Click the pic for bigger versions.)

First tip: You are not lighting the water. Since water is a specular object, you are lighting what the water reflects. So you light the area (most likely the backdrop) that you see reflected in the still water from your camera position

As for timing, that one is easy -- just take the junk mail approach. Lots of water drops, lots of repetition, and something cool and unpredictable will come back. This is part of the fun. Just make sure you get your technical stuff down pat first, so when that perfect moment happens, you'll have a winner.

Last, and speaking of technical stuff, you will want shoot in a (relatively) dark environment so the flash pulse can effectively be your shutter speed.

The first video below (a basic how-to) suggests a setting 1/16th power. That's a pretty fast pop -- about 1/11,000th of a second for an SB-800, for instance. But you can get even faster times if you drop the power further. And when freezing a drop of water, microseconds matter.

The tradeoff? Aperture vs. pulse length. You will need enough power to get you enough aperture to carry the depth of field you want. But don't overdo the power to get excess aperture, as that'll needlessly stretch the pulse length of your flash.

In lighting, everything is a tradeoff.

Check out this excellent "how-to" video below, by Gavin Hoey. (RSS and email readers may need to click on the post title to view the videos.)


See? Easy, fun and cheap if you can get that flash off-camera.

And these same techniques can be amped up to yield more amazing photos. Artist Martin Waugh has built a career out of making art from drops of water. If you are into this kind of stuff, make sure to check out his amazing gallery to get a glimpse of just what is possible.

Just below, a video featuring Waugh from a segment of the Discover Channel show, "Time Warp." These guys are filming in 10,000 frames per second, which is Chase Jarvis Kung Fu territory. At the end, they actually have drops colliding with splashes in mid-air.


This is worth the wait for full-screen HD. Especially at about the 5:50 mark. (And I see my same old Nikkor 55/2.8 macro on the high-speed camera.)

Other than the obvious cool factor, the takeaway for me from this video was a look into Waugh's lighting. Background gets one color, and the top light gets another. This way, you get multiple colors in the water depending on the angle of the water surface being reflected.

A very cool project for a rainy afternoon, IMO. Or even better -- offer to take the setup into you kid's science class at school and let them try their hand at stopping time to study how liquids behave.

If you decide to try it and upload to Flickr, be sure to tag your photos with the words, STROBIST, WATER and DROP and upload it to the Strobist group. That way, they will come up in this search and we can all see them. (Check it out -- there are already some killer shots there.)

Or if you would rather blog your water droplet lighting exploits for the whole world to see, make sure to include the intact phrase "strobist water drop" (no quotes) and we can all see it via this Google blog search.

Full RSS feed, from Strobist.com. Videos are not viewable in emailed posts. Click the post title to see any embedded video and/or to view or post comments. This month's feeds are sponsored by:


Things you can do from here:


Wednesday, June 10, 2009

Boot Camp II: First Assignment


Sent to you by MarcG via Google Reader:


via Strobist by noreply@blogger.com (David) on 6/9/09

There is an old saying: The cobbler's kids have no shoes.

The translation of which, for us, is that many photographers do not have a recent headshot of themselves.

Your first assignment will allow you to rectify that situation, and perhaps lend a helping hand to someone who may recently have been affected by current economic situation.

Done correctly, this assignment will yield both a model for you, and a photographer for your own headshot.
__________


The first Boot Camp II assignment is set against the backdrop of a national unemployment level in the U.S. that is hovering at 9.4%. Which is to say that you almost certainly know someone who is out of work. And many other areas (including localized pockets in the U.S.) have even higher unemployment rates.

So, rather than photographing your hand-painted Dungeons and Dragons figurines in your late-night living room studio yet again, we are going to put you to some good use for a change. People who recently have lost their jobs are likely working overtime on social networking, resumés, etc. And a nice headshot can be a very helpful thing for them.

To be clear, you can choose anyone you want to photograph, and any person will be a valid subject for the assignment. But if you are going to be making a headshot anyway, why not point that effort somewhere it can do some good? And as a bonus, you'll have someone you can swap places with so they can take a nice headshot of you. (Just show them how to grab focus on your nearest eye, recompose and shoot.)

If you are a total newb and don't know where to start, might I recommend the L101 Corner Headshot tutorial? You can almost certainly do better than that, but it will get you off on the right foot.

Coincidentally (not really) we also just finished up a three part series on some different ways to approach the lighting on a headshot. (Here, here and here.) You don't need a lot of gear to do this one -- every shot in this post was done with either one or two flashes. (And no, I am not going to walk you through all of them. It's time for you to do some thinking.)


Make it Appropriate

If you are shooting an out-of-work accountant, do something that is fitting to his or her skill set. Unless, of course, they are using their job loss as an excuse to launch a career in stand-up comedy or something. You would not shoot an actress the same way you would photograph a CFO.

Work to make a portrait that will fit your subject. This is also good practice for creating photos that work within the boundaries of a publication and/or assignment. And far from being a hindrance, you'll find that these kinds of restrictions tend to help you by narrowing down your choices.

A really good headshot will work well either as a small mugshot or as lead art in a double truck. Don't dismiss a headshot just because the subject matter is about the size of a football. Some photographers build entire careers out of tight portraiture.

Of course you will be paying attention to the light. But once you work that out, don't forget to make a photo. Work with your subject to get an expression, a moment, a little extra intensity, a look, some levity -- something.


Adjust to Your Skill Level

Headshots are everywhere. One might serve as booking mugs at your local police station, another might be next month's cover of WIRED magazine. The beauty of this first assignment is that the difficulty level can be adjusted to the photographer.

At the very least, as a newb you'd be looking for a clean, elegant professional-quality headshot. But if you are more advanced, you can pretty much go anywhere with it.

You know where your comfort zone is. Make sure you get the bases covered. But if that is easy stuff for you, try to stretch a little. Headshots are easy to get into and offer endless opportunity for creative growth.


How to Submit Your Assignment

I am serious about the "shoot both ways" aspect. To complete this assignment, you will need to turn in two photos -- the one you shot of them and the one they shot of you. Ideally, you'll combine them in Photoshop or some other imaging program. Just cut and paste them side-by-side.

If you do not have the software to do something like that, put both photos into Flickr, turn in only your photo of the other person, and link to the corresponding photo of you in the caption. (Alternately, you can upload them at the same time so they are right next to each other in your stream if you do not know how to create an html link in the photo's caption.)

Don't go all vampire on us -- you'll need to have both photos to fulfill the assignment. Please do not submit just half of the job.

And for the introverts, this is the only assignment in which you will be required to photograph another actual human being. Screw up your courage and ask someone if you can photograph them for a school assignment.

If they say, "Hell, no!" and beat you up just for asking (after all we are talking about an irrational fear here, right?) then just ask someone else. Maybe someone a little smaller (and not very fit...)

Your assignment is due by the end of the day (your local time) on June 23rd. Don't be late.


How to Tag it

First, upload your assignment to Flickr. Then join the Strobist Group, if you are not already a member. Submit your photo to the group using the "add to group" button just above your photo. Do not wait until the last minute to do this. Flickr apparently has a waiting period before you can submit to groups.

Oh, and since you are adding it to the Flickr Strobist Pool, tell us a little bit about your lighting in the caption. That way, you'll be of help to someone else.

If you need technical help on the Flickr stuff, try this thread. Please read the thread before asking any questions, lest someone reply that "your father smelled of elderberry" (or words to that effect.)

(UPDATE: They have already started in with the general craziness, so you can skip to the more relevant stuff by jumping to this point if you like.)

After you have submitted your assignment, tag it with the following term:

SBC2ASSIGN1

If you are successful, your photos should appear in this search within a few minutes. Please, only submit one entry. For most people this will be two photos, side-by-side, combined into one. As we are hoping to create an inclusive slideshow, please do not tag photos which are not appropriate to this assignment with the SBC2ASSIGN1 tag.

For the same reason, please do not turn in any photos which are NSFW. As we noted yesterday, breaking these rules will get (at least) your photo removed from the Strobist pool, and thus, this assignment. Thanks much.

Please note that your photo must be tagged correctly and in the Strobist group pool to show up in the search.

If you want to ask questions, or otherwise discuss this assignment, you can do so in this thread.


And the Winner Is ...

One winner will be chosen from qualified entries. That person will receive the following, shipped anywhere:


• One Speedlight Pro Kit (more info)

• One Strobist Lighting Seminar 8-DVD boxed set (more info)

• One set of Strobist Trade Secret Cards (more info)


Winners Never Cheat; Cheaters Never Win

Since there is prize booty involved, we have to keep it fair. I do not wanna see your previously shot headshots popping up as entries. To some extent, the fact that you will also be including a headshot of yourself in similar light will help to keep the bad guys honest. But just to make it even harder to game the system, the following photo will be required from the winning entrant before any prizes are sent anywhere:

Winners will be required to submit, on request, a shot of their subject, taken in the same shoot, holding up one finger. This is for authenticity verification reasons only. So, don't forget to shoot a frame of that while doing your assignment. Just in case you win.

(And let's keep it to the index finger, please...)

Full RSS feed, from Strobist.com. Videos are not viewable in emailed posts. Click the post title to see any embedded video and/or to view or post comments. This month's feeds are sponsored by:


Things you can do from here:


Tuesday, June 9, 2009

Gear I Regret Buying and Things I Really Love


Sent to you by MarcG via Google Reader:


via Yuri Arcurs by Yuri Arcurs on 11/30/08


This is the don't-make-the-same-mistakes-I-did post. Enjoy.


Things I Recommend you Don't Buy


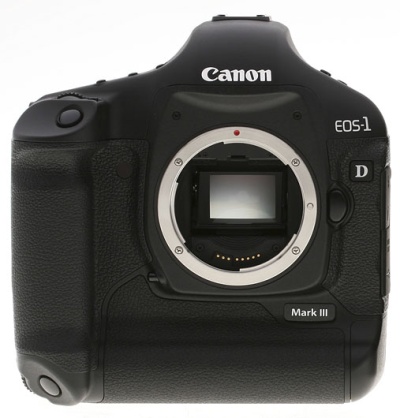
1. Don't buy at Canon 1Ds Mark lll

Don't buy a Canon 1Ds Mark lll. Buy the new 5D instead and wait for whatever is around the corner coming from Nikon. It just so happens that I have bought my staff three of these cameras, so I guess I kind of regret that…Doh! Canon is for sure going to launch a bigger sensor camera that will top the mark III and my guess is that they will do so within the next six months. It will probably also have a slightly bigger sensor than the full-frame.


2. Don't buy at a PC for Image or Film processing.

Don't buy a PC! Any PC! They are just not meant for working with image processing. I really regret starting out as a PC guy and investing in PCs for my first employees. Good quality PCs, and expensive with 4GB of super fast memory, raptor hard drives and great monitors. I now have only Macs and my expensive PCs are just standing there in my storage area unused. Very stupid indeed!


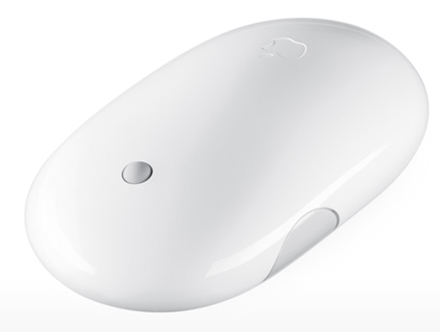
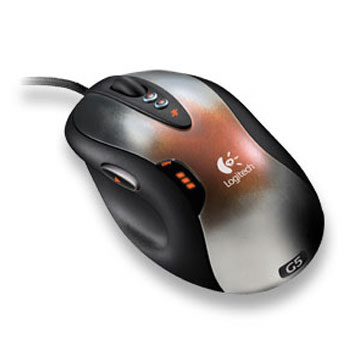
 3. Don't buy at a Mighty Mouse or a Mac wireless keyboard.  

Don't buy a Mighty Mouse, the new thin Apple keyboard or any wireless input device. When using Photoshop all day you need precise input devices. The Apple mighty mouse and their new ultra thin keyboard are meant to be pretty before practical. This one aspect irritated me so much when I was going from PC to Mac that I was close to giving up the transition. To this day I am still irritated that Apple has not given us better ways for adjusting the mouse speed and acceleration and still doesn't have a "high performance" mouse available. Get a hold on the old mac keyboards, the bigger ones, and get a hold of the Logitech G5 mouse. You'll be much better off with them than what Apple offers today. The Logitech G5 runs well even without a driver, but make sure you use a good surface for the sensor to pick up the movement. A good surface has texture.


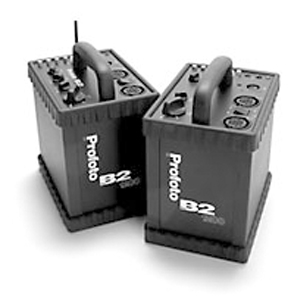
4. Don't buy Battery Packs

Don't buy large battery packs and lights. Here's a better and cheaper alternative: buy a couple of compact heads that run on normal electricity and a generator for when you want to be mobile. Put the generator far away from the shoot and bring a long extension cord. The thing they don't tell you anywhere is that the batteries for the power packs are so heavy that you could just as well have brought along a compact generator, which will run for way longer then the batteries and will generate much more power. Battery packs sometimes take more then two seconds to charge between flashes which is quite long. Compacts flashes charge very fast so for a superior and more cost effective setup, buy compact heads instead. My favorite is the Profoto Compact 600R (radio). We have 12 of those in my studio.


5. Don't buy a fancy car.

Don't buy a fancy car. Your models and assistants just want more pay and you spend more money on gas.


6. Don't buy cheap basic equipment

Don't buy cheap basic equipment. It's a waste of money because you will replace it with better equipment along the way.


7. Don't buy the Manfrotto Neotech Monopod….unless…

You see my video on how to prepare this device for professional use. If you don't do these small adjustments you end up with a useless product that will last three to five shoots and be worn down so much that it is useless. That is why the "manfrotto Neotech" is under things you should not buy, because straight from the factory, it is useless.


8. Don't buy any off these lenses. They are too unsharp.

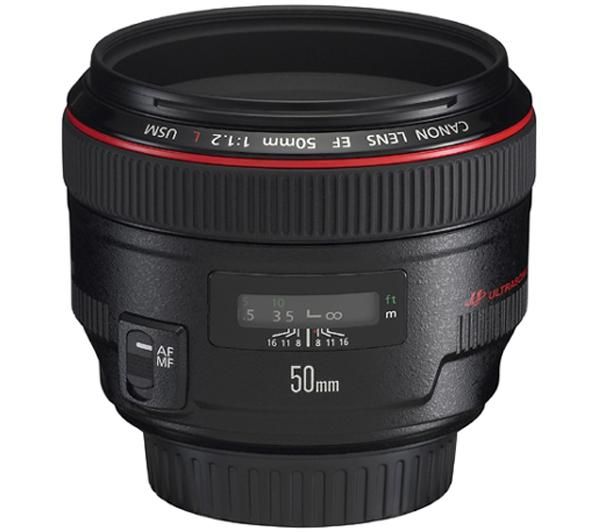
Don't buy the canon 35mm 1.4L, the canon 50mm 1.2L or the canon 24-105mm 4L. They under perform in sharpness so much that they are not usable for fashion or stock. (The canon 24-105mm is ok above f9). The 35mm 1.4L can be very sharp, but 2/3 are lemons and you need to return them. Therefor, don't buy the lens unless you can get it sent back if you are unsatisfied.


Things I am really glad I bought.


1. Get an Apple X-serve and X-raid

My Apple X-serve and X-raid with 7 Terabytes of storage. Once we resolved the write permission issues we had starting out (and still have a little today) this machine just worked and never failed. It just runs and runs. Simply a fantastic piece of hardware with read and write speeds of up to 250mb per second. The Mac Server hardware FTP solution is fantastic, yet very simple, and again, it just works!


2. Get a Wacom Pen

A Wacom pen. Even though it took me a full week of hand cramps to get this input device under control, I have NOT regretted learning to use this wonderful tool. Today the Wacom is a part of my workday and basically anything I do in Photoshop. I use the Wacom Intuos3 A4 oversize and think this is a perfect match between size and precision.


3. Get Google Documents.

Goggle Docs, Calendar and Gmail. My whole department runs Gmail, a shared G-calender and have tons of shared docs. No one in my department saves any documents or spreadcheets on any computers or hard drive. It's all Google Docs. This way we can edit, share and discuss real-time the things we are working on. Perfect for any department. My arcurs.com email is forwarded to my gmail account and my gmail account is set up so that my reply address is also from my arcurs.com address. Sending huge files among two gmail accounts takes only seconds – perfect for the creative person. Gmail accounts don't get spam – fantastic!


4. Get a workstation with Raid.

My maxed out Mac workstation. 32GB of RAM in my workstation. A true time/life saver. My primary workstation is a Mac Quad Core with 4TB in raid and reads with speeds of 200mb sec. A pure pleasure to work with and I have never regret a single penny I spent on this machine.


5. Get an apple 30 Inch Cinema display.

A 30 inch cinema. A perfect monitor. Yes…there are monitors out there that have better colors and better contrast such as the DELL 24". Unfortunately such monitors display your images too good and you end up, under-saturating, under contrasting and sometimes under exposing as well. The 30" apple cinema is perfectly "shitty" in an ironic way, which makes it "not shitty" but pretty darn good!


6. Get 1Password for mac. 

1Password for mac. Could not live without it for one day. Remembers your passwords and log-ins and works perfectly. This comes in a version for PC called Roboform and works just as well.


7. Lenses I love and that are sharp. (added)

The canon 135mm, 2.0L, the canon 85mm, 1.2L, the canon 200mm, 2.0L and the canon 70-200mm 4.0L. I Prefer the new Canon 70-200mm USM IS, 4.0L over the old Canon 70-200mm, 2.8L USM IS. The new one fringe less and is sharper or as sharp as the older.


Things you can do from here:


Branding… A cliché?


Sent to you by MarcG via Google Reader:


via Yuri Arcurs by cindy on 4/22/09

If you've been reading my blog you've heard me talk about branding before. Branding yourself is extremely important. Today I attribute10-15% of my sales to the brand I've created. For me that translates into over $10,000 USD per month—have I gotten your attention yet?
Since I first wrote about the importance of branding yourself as a photographer, things in the microstock industry have changed and the concept has gotten even more important.


Why you must brand

Let's use Shutterstock as an example. When I first wrote about branding, Shutterstock was accepting about 30,000 new images per week. This week, almost 80,000 new images were accepted. Think about that: 80,000 new images this week alone! This is an astronomical amount of new product added each week. Many people wonder if that quantity is really sustainable. The answer is yes, and I predict these image libraries will continue to grow at a breakneck pace. Like it or not, there is huge competition out there and this is just the beginning.

But guess what? I like it. Why? Because this huge volume of photographs can actually work in your favor if you're careful to stand out from the crowd. Buyers are utterly overwhelmed by new images and new content. They drown in page after page of options. Most are in a rush, working on a deadline, and need to find great images fast. So what do they do? They develop favorite photographers and artists. People they can go to for consistent freshness and quality without the hassle of groping for a needle in a haystack. That's how our buyers are navigating this cluttered landscape today. And guess what? If you aren't anyone's favorite…well, you do the math.

There are two things that support my assumption. One is some interesting backend information the CEO of Crestock shared with me. He said that the most converting search string in their search bar was a search for "Yuri Arcurs". If you're not too familiar with SEO terms, "conversion factor" refers to the number of browsing visitors that actually "convert" into customers. So, apparently people went to the Crestock site and searched for my name, and if they got a result, they would sign up for an account (my name was not the only one on the list). To sell you must be seen. If you get a loyal following of buyers, they'll look for you specifically. That translates into a win-win for both sides.


Building a brand 101

Follow these four tips and you'll be well on your way to developing a great brand for yourself.
First, have great taste. Edit your own submissions in a very tough and optimized way. Don't settle for mediocre. Every picture in your portfolio represents you. If you are discerning and focused, your buyers don't have to root through any junk. A happy buyer is a repeat buyer.

Second, size matters. Yes, unfortunately you really need a lot of images. And not just any images, you need a large quantity of great stuff. Otherwise, you end up with a huge portfolio that's more like a garbage-bin of everything in your life that looks just a little stock—not appealing.

Third, don't copycat. Do your research elsewhere—don't just do what other microstock photographers are doing. The goal isn't to blend in, it's to be unique. I intentionally do not look for inspiration in microstock. Why shoot the same stuff that everybody is competing so hard for while so much is still untouched in micro?

I find my inspiration from the following sources:
Walking around in my hometown looking at advertisements and window displays: 10%
Looking at my own earlier shoots with a critical eye: 10%
Browsing the web: 10%
Magazines: 20%
Traditional agencies (macrostock): 10%
Microstock agencies: 0-5%
Brainstorming and storyboard building (often with my stylist): 30%
Talking to my partner Cecilie about my shoots: 5%

Fourth, do the unthinkable. I'd say that about 20% of the time I spend on a shoot I spend taking pictures that are off the wall and different. I have absolutely no idea about whether these ideas will sell or not. But by pushing the boundaries, using your instinct and working with a good model, you may just come up with something great in the end. Not a lot, but something, and it's this special extra oomph that really make your shoots stand out from the crowd.
If you follow these basic ideas your brand will begin to grow in size and strength. Nowadays, with almost 100,000 new images accepted at Shutterstock each week, being "favorite worthy" is more important than ever.


Things you can do from here:


I spy with my little eye


Sent to you by MarcG via Google Reader:


via Yuri Arcurs by Yuri Arcurs on 5/2/09

I spy with my little eye…
How letting a little mess into your photos = sales

Successful stock images are clean, conservative and simple…right? Well, yes. And no. You can also create blockbuster images by breaking those rules. If you're running a little low on inspiration, consider messing things up a bit.  I'll tell you how I like to do it.
First, let's face it: basic stock images are often bland, square, and all around vanilla. Yes, these photos have their place, but if you want to add a little spice to your portfolio, consider doing something more random and authentic. Use the I spy method and add a little mess to your pictures. I promise they will instantly stand out from the crowd.


What is I spy?

The "I spy" concept was introduced to me by Scott Gordon, former Chief Creative Editor for Veer Images (and now part of the Yuri Arcurs Production team). He and I talked about small variations that a photographer can use to enhance the creative output of a shoot. He explained his notion that a little bit of intentional chaos can sometimes make a good image great. This method is designed to engage a viewer's curiosity. By leaving things in the photo that are vague but intriguing, it's as though you've set out  a trail of breadcrumbs – hints about the story behind the image, and this subconsciously captures our interest.
Real life isn't always simple and ordered. It's messy, it's three dimensional and it doesn't fit inside a tidy viewfinder.

If you can intelligently incorporate some of that real world chaos into your images, they radiate authenticity and the buyers love it.
This is a daring approach and should be used sparingly, but when it works, it really works.  So what do I mean exactly by "mess"? Well, what I'm talking about is leaving some extra (even slightly distracting) elements in the shot, in the periphery. These unplanned items add a feeling of spontenaiety and truth to your pictures. When they work, the resulting images are alive and energetic, they add a mature level of sophistication to your portfolio and surprise—they sell.


Through the grass, glass or leaves

One of my favourite ways to use this technique is by shooting through grass, leaves or through glass.

Grass or leaves. Getting down to a bug's eye view in the grass really opens up a new world of possibilities. Lay on your belly and let a few strands poke into the frame. This doesn't distract too much from your main image, but it gives a wonderful sense of context and place. All of a sudden instead of a boring static shot, you have a picture with a sense of place, the viewer knows where they are and what's going on, and feels as though they're getting a sneak peek in on the action. They want to know more.

Glass. Shooting through glass gives a great alive and gritty urban feeling. There is a certain anonymous voyeurism to this type of shot. The viewer feels like they're on a busy street catching the subject unawares. We get a sense that we are in a busy urban place where things are whirling about, but where our subject is unknowingly the object of attention. Put these elements together and you have a shot with some real oomph and charisma. 
In conclusion - does it sell?

Yes.  It sells.  Adding these extras to your images makes them ring of truth, and in the end that's what our buyers want. Using this method does something else that's very important too. It beefs your portfolio up with something more mature, interesting and different, and in the end that's what keeps our buyers coming back again and again.  Give it a try and good luck!


Things you can do from here:


Thursday, June 4, 2009

西方仍在误读1989年的中国


Sent to you by MarcG via Google Reader:


via FT中文网 - FTChinese.com - 今日焦点 by 作者:英国《金融时报》中国投资参考总编辑金奇(James Kynge) on 6/4/09

每当我回想起1989年的北京城中,天安门广场上持续数周的示威活动后发生的那场镇压时,都不由得感到不安。当时,作为路透社(Reuters)记者团队的一员,我报道了那起事件。

那当然是一段残忍而痛苦的岁月,但这并非我不安的原因。令我感到焦虑的是,我认为我们——西方媒体——对那段历史的叙述并非完全正确。

人们说,新闻不过是记录历史粗略的初稿。但现在的问题是,这份初稿似乎已被奉为圣典,大部分内容未经校对就化入了公众的良知。

那段时期最具标志性的影像—— "民主女神"泡沫塑料雕像安详地望着紫禁城、不服命令的学生只身站在坦克面前——将善与恶、自由与镇压、民主与独裁区分得一清二楚。在这个道义善变的世界,天安门事件成为一根标杆,是我们评价他人时一个令人满意的固定参照物。

但事实果真如此吗?我不否认这起事件的残暴,也不否认后来进行了镇压。与其他驻京记者一样,我也有中国朋友后来被关押起来,或受到了刑讯折磨。

但我确实对西方媒体的一种说法抱有疑问,即那些示威游行是在"支持民主"。即使是现在,众多纪念天安门事件20周年的评论文章还在重复着那个说法:学生们是在"要求民主"。

事实并非那样条理分明,就像亲身经历过游行示威的中国作家马建在其最新小说《北京植物人》(Beijing Coma)中所展示的那样。马建将个人动机与公众主题交织在一起,以此说明这场运动从未遵循过清晰的脉络。说到底,当时的一代人正在努力摆脱毛泽东统治遗留下来的束缚,这是他们对诉求的宣泄。

几乎所有的一切都被纳入了诉求所反对的范畴:腐败、裙带关系、通胀、警察暴力、官僚主义、官员特权、媒体审查制度、对人权的侵犯、狭促的学生宿舍、以及对民主言论的压制。但如果说示威就是为了"要求民主",则是将事情过于简单化了。

事实是,天安门广场上的学生对西方民主仅有模糊的零星了解。抗议的矛头指向了中国新兴精英阶层对既有体制的滥用,从这个意义上讲,这些学生的动机更多地是出于对社会主义理想遭到背叛的愤怒,而非渴望建立一套新体制。在天安门广场上,保守情绪丝毫不亚于激进情绪。

20年过去了,这种论点似乎很少有人提起。但在我看来,它们的意义极其重要。将天安门事件称为支持民主的运动,助长了西方对中国过去及未来的不尽正确的叙述。

这也导致了另一种说法无法切中要害——中国人固执地认为,西方世界永远怀有恶意的企图。

我们西方人说服自己相信,我们指责中国的人权状况,是在帮助受压迫的民众争取自由。这有时候可能是事实。但在大多数情况下,我们的指责只会让中国共产党宣传的中心论调更为有力:无论西方怎样努力遏制,中国都在崛起。

1949年,毛泽东站在天安门城楼上,用以下词句宣告了中华人民共和国的成立:"中国人从来就是一个伟大的勇敢的勤劳的民族,只是在近代是落伍了。这种落伍,完全是被外国帝国主义和本国反动政府所压迫和剥削的结果。"在宣传部门的口中,今天的情况较那时几乎没有改变。

这种说法的有效性从以下可见一斑:与1989年时相比,中国人现在普遍对外国人更为戒备,尽管中国从那时开始的经济转型主要源自与外面世界的交流。

大多数时候,隐含在这两种不同说法当中的敌意被掩盖住了——只有当像去年西藏动乱那样的事件将这种敌意突然释放出来时,我们才会意识到,我们之间的距离有多么遥远。

译者/何黎

全文


Things you can do from here:


借书限额下月起提高


Sent to you by MarcG via Google Reader:


为了更好地培养国人的阅读风气,国家图书馆管理局(NLB)将从7月1日起提高人们借书的限额,持有普通会员卡(Basic Membership)的公众可一次借阅6本书刊,包括最多两套视听材料(Audiovisual materials)。


Things you can do from here: